
Easy Forced Navigation in Captivate 2019 Update 2
Have you ever had to create a click to reveal interaction where the continue or next button remains hidden until the learner clicks all the items? Traditionally this would require multiple user variables to track what has been clicked and multiple conditional advanced actions to do all the programmatic stuff behind the scenes. This was time-consuming and not something new Captivate users found easy to do. This just got super easy with Adobe Captivate 2019 Update 2 (version 11.5).
A common request we get from our stakeholders is the idea of a multi-state object click to reveal but with a hidden continue or next button, sometimes known as forced navigation. This traditionally requires that you create a variable for each button-click to keep track if the learner has clicked on that item, as well as an advanced conditional action that performs the state change but also checks if all the items have been clicked before showing that continue or next button. That means in a six button click to reveal you need six variables and six conditional advanced actions. If you are curious or are still using Adobe Captivate 2017 or older, here is an example of how I used to create such interactions:
Hide the Next Button in Captivate Until Learners Do Something First
Today there is an easy way to do this with Adobe Captivate 2019 version 11.5 or newer. Even with this smooth workflow, there are some rules you must follow. I've attempted to write them out to make this easy for you to do on your own.
Step 1. Label Your Slide
First, you must label your slide multistate. Don't worry if your on-screen title needs to be something else. This lets Captivate 2019 know that this sort of interaction is going to be on this slide.
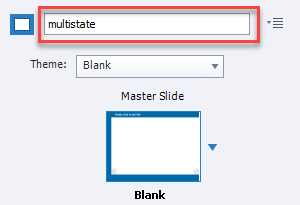
Slide Label in the Slide Properties Inspector
Step 2. Label Your Multi-state Object
Second, you must label your multi-state object ms_ followed by the name you wish to give this interaction. For example, I'm calling mine ms_impacts. Your multi-state object can contain additional objects as mine does. I have a smart shape with text, and with each state, I've also included an image. Both the smart shape with text and image change with each click.
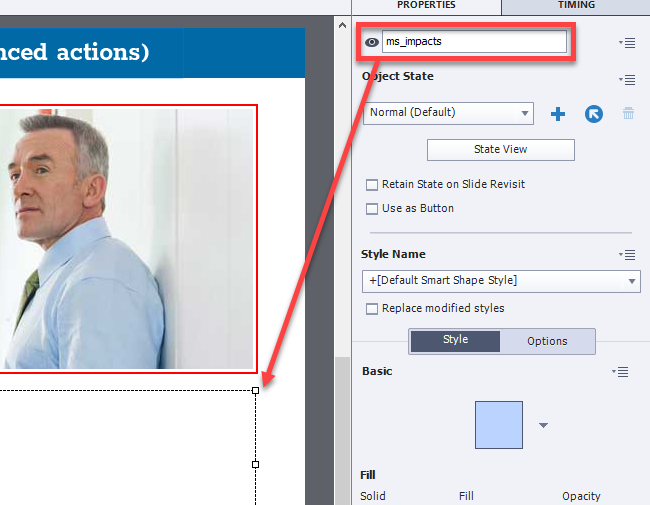
Multi-state object label
Step 3. Label Your Buttons
You must create the same number of buttons as you have other states in your multi-state object. These need to be precisely labeled according to the name of all the states in your multi-state object. In my example, I have the following states in my multi-state object.

The state names in the multi-state object
I created six buttons each set for "no action" to represent all the states in ms_impacts. Label each shape button <interaction name>_<state name>. In other words, I labeled my first button impacts_workgroup_conflicts, and so on.
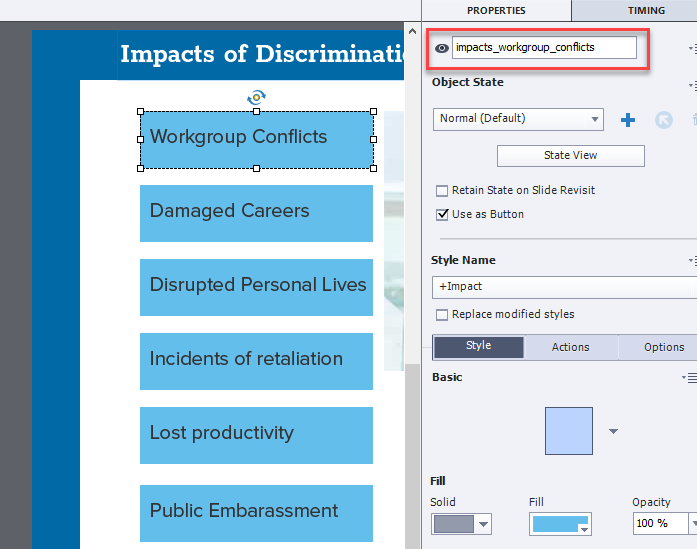
Labels for the shape buttons
Step 4. Label Your Hidden Next Button
Lastly, make sure you have a next or continue button that you have labeled <interaction name>_completed. For my example, I'm using an arrow button to advance, and I've selected the Not visible in output icon and labeled it impacts_completed as you can see below.
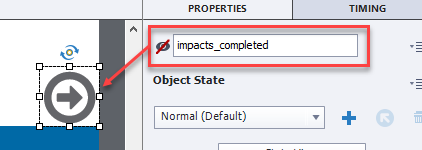
Label your hidden next button
If you follow the correct labeling conventions of all of these items, this should work exactly like the more complicated interactions we used to create in the past. Both interactions behave the same, but the difference is that this method takes only minutes to create, whereas the older, more complicated process took longer. You can have as many of these interactions within a single project as you wish, so long as you follow the naming conventions. I can't see why I would use the conditional advanced actions method when I now have such an easy process.
Exclusive to my Patreon subscribers you can download the project file used in the creation of the this video.
Images as Buttons in Captivate 2019 Update 2
In this video tutorial, I show you a couple of ways the new images as buttons feature can be used in your eLearning development workflow. In addition, this video covers a bonus feature in the form of being able to not only use SVG files as buttons but be able to edit the fill color of your SVG images as well.
In this video tutorial, I show you a couple of ways the new images as buttons feature can be used in your eLearning development workflow. In addition, this video covers a bonus feature in the form of being able to not only use SVG files as buttons but be able to edit the fill color of your SVG images as well.
As I say in my video this is probably the most undervalued update to Adobe Captivate 2019, however when I think of the hundreds of shapes used as buttons or regular image buttons I've used over the years that have provided an unsatisfying result, I'm very excited to see how this speeds up my development process.
Please note that I recorded this video with prerelease copies of the software and there may be differences in how the final release version looks and behaves.
Copy and Paste Appearance in Captivate 2019 Update 2
I like to think of this new feature as the format painter for Adobe Captivate. In this video tutorial, I show you how the new Copy and Paste Appearance feature works in Adobe Captivate 2019 Update 2.
I like to think of this new feature as the format painter for Adobe Captivate. In this video tutorial, I show you how the new Copy and Paste Appearance feature works in Adobe Captivate 2019 Update 2.
Please note that videos such as this one were prepared in advance using the prerelease version of Adobe Captivate Update 2. There might be subtle differences in the appearance or functionality of the final publicly available software.

Vimeo Videos as Interactive Video in Captivate 2019 Update 2
In this video tutorial, I show you how you can now add Vimeo videos to your interactive videos in Adobe Captivate 2019 Update 2.
In this video tutorial, I show you how you can now add Vimeo videos to your interactive videos in Adobe Captivate 2019 Update 2.
Please note that videos such as this one were prepared in advance using the prerelease version of Adobe Captivate Update 2. There might be subtle differences in the appearance or functionality of the final publicly available software. I make no guarantee that the features of functionality are available in the final release.

Free Update to Adobe Captivate 2019
In this video tutorial, I show you the exact steps to update your copy of Adobe Captivate 2019 to version 11.5..0.476 (Update 2).
In this video tutorial, I show you the exact steps to update your copy of Adobe Captivate 2019 to version 11.5..0.476 (Update 2).
Virtual Reality Improvements in Adobe Captivate 2019 Update 2
In this video tutorial, I show you some of the improvements to virtual reality in Adobe Captivate 2019 when you install Update 2.
In this video tutorial, I show you some of the improvements to virtual reality in Adobe Captivate 2019 when you install Update 2.
Please note that videos such as this one were prepared in advance using the prerelease version of Adobe Captivate Update 2. There might be subtle differences in the appearance or functionality of the final publicly available software. I make no guarantee that the features of functionality are available in the final release.

eLearning Livestream - Exciting News Coming to a Computer Near You | June 12th, 2019
Tune in on Wednesday, June 12th at 10 AM EDT for some pretty exciting news.
Tune in on Wednesday, June 12th at 10 AM EDT for some pretty exciting news.
To view this livestream on YouTube and participate in the live chat visit https://youtu.be/rW9c-s3uQng

What Computer Should I Buy?
I recently went through the process of considering a new computer, researching my needs, and buying a new Dell XPS 15 and I thought I would share my decision-making process in the hopes it would help all of you as well.
The actual specifications for Adobe Captivate are relatively low. For Windows, Adobe recommends a 2 GHz or faster Intel processor, and you should be running The 64-bit version of Windows 7 with Service Pack 1 Or newer. For Mac OS, you need a multicore Intel processor, Mac OS X v10.13.5 (or later). Regardless of which platform you choose you will need 8 GB RAM, 10 GB of available hard-disk space, a display capable of 1024x768 resolution, although Adobe recommends 1280x1024, and the video card needs to be compatible with WebGL Graphics.
Those specifications are what I would describe as the bare minimum. When I buy a new computer, I do so with the future in mind. I want my computer to be able to run well for at least three years of new versions and software updates, preferable though, I want it to last five years.
And while Adobe Captivate is the core application for me for eLearning development, eLearning designer, developers often have to wear many hats. For example, you might be called upon to record your webcam for an explainer video at full 30 fps HD (something Captivate 2019 can't do). You also may need to edit and publish the resulting video in Premiere Pro CC, an application that is hugely processor hungry and requires a much higher set of specifications and who knows what else. You need to prepare for these types of requests. Don't forget that at the time I'm writing this article the most up to date version of Adobe Captivate in 2019 update 1. It's safe to assume that there will be a major release before the year is through and several more over the next three years.
So my short answer is to buy the best computer that your budget will allow. If a hundred more dollars will make a difference, then bite the bullet and go a little beyond budget but if spending a bit more right now can stay off the purchasing of your next replacement by a year or more, it might be worth it.
I just completed this exercise, and here was my decision-making process. Three years ago I purchased an HP Pavilion with a 17" display. I made some wrong choices when I bought this machine. I bought it with the thought that I wanted a desktop computer but in a portable package since I couldn't afford both. The reality was that a 17-inch laptop is difficult to use when going mobile. I only travel for work about three or four times per year, but there is nothing more exhausting than lugging around a giant notebook from your hotel room to a conference facility. Unfortunately, I'm not important enough to always get a place in the same hotel as the conference. I know, first world problems. This time I decided to return to a 15" display and in as small a package as I could get.
The first decision was Mac or PC. If you do a lot of video demos and software simulation and the desktop you need to be capturing is a PC, this makes the decision easy. Another factor is cost. While Macs are designed to be beautiful, they usually cost about $1,000 more than the PC equivalent. Since the money for any equipment for my company comes out of my pocket, the decision is pretty easy for me.
My previous laptop came with a 2GB hard drive, which I soon replaced with a 500GB SSD. This time around, I wanted an SSD right from the start. I looked for SSDs that used the M.2 standard, which is significantly faster than the SATA III SSDs from a few years ago. Ideally, I wanted a 1tb M.2 NVMe drive, but I knew I could get away with 500gb and upgrade later.
I knew I wanted at least 16GB of RAM. Again, this is an area you can upgrade but the machine needed to start at 16GB. A lot of YouTubers are also serious video editors for apparent reasons. Many spoke and upgraded to 32 right from the start. Knowing that video editing is part of my workflow, I will be keeping an eye on RAM prices and jump on a reasonable price when it comes along.
Again I was willing to give up my 17" display for the advantage of something portable. I want quite prepared to go for a 13" but I knew I used to have 15" for many years.
When I purchased my 17" HP Pavilion, I choose it because it was an intel core i7 processor. I learned after the fact that not all i7 processors are the same. The HP used an i7 6500U, which is only a two core processor and somewhat underpowered. I started looking at laptops that had the i7-8750H. While not the latest chip from Intel or the fastest, it is up there. It's a six-core processor that runs at 2.21GHz with a max turbo frequency of 4.1GHz, so I expected to see an improvement with multitasking and performing tasks like rendering my edited videos.
I looked at many models of machines. Some important choices were the Razorblade 15; It was slim and had all the specs I was looking for; several gaming laptops had a great video card and the aforementioned i7-8750H processor, but they were bulky. I started to notice that when looking at various machines, I was always comparing them to the Dell XPS 15 9750. I decided that instead of trying to find a less expensive version of the Dell, I should buy the darn thing. I was lucky and noticed a few ways to justify making the purchase right away. First, it went on sale for about $250 of the regular price. Second, signing up for email notifications on the Dell website for me a further 10% off. Also, Dell offers 12 months no interest if you pay it off within that period.
The XPS 15 arrived this week, and as you can tell from unboxing video, I was very excited to have my new hardware. I hope this article helps you with your decision-making process whenever you need to make it.

Disable the Progress Bar in Adobe Captivate
In this tutorial, I show you a solution initially created by Michael Barshinger to disable the progress bar in your Adobe Captivate eLearning projects. This gives your learners the advantage of seeing their progress without allowing them to scrub forward and skipping valuable content.
In this tutorial, I show you a solution initially created by Michael Barshinger to disable the progress bar in your Adobe Captivate eLearning projects. This gives your learners the advantage of seeing their progress without allowing them to scrub forward and skipping valuable content.
Here is the original article with the details on how to do this.

First Look at Social Learning in Adobe Captivate Prime
In this video, I walk you through my first impression of social learning in Adobe Captivate Prime.
In this video, I walk you through my first impression of social learning in Adobe Captivate Prime.