
Trim and Crop Videos Using Adobe Media Encoder
In this video, I show you how you can trim the length of your videos and crop out extraneous portions of your videos using Adobe Media Encoder.
In this video, I show you how you can trim the length of your videos and crop out extraneous portions of your videos using Adobe Media Encoder. Do you only have Adobe Captivate? Don't worry, you already have Media Encoder with your Captivate license.

How to Place Other Objects on Top of Web Objects in Adobe Captivate
In this video tutorial, I show you a hidden trick to place other objects on top of web objects in your Adobe Captivate eLearning project.
In this video tutorial, I show you a hidden trick to place other objects on top of web objects in your Adobe Captivate eLearning project.

Adobe Captivate Fake Slide Numbers Using Shared Actions
In this video, I show you how you can write a shared action to maintain fake slide numbers in your Adobe Captivate eLearning project.
In this video, I show you how you can write a shared action to maintain fake slide numbers in your Adobe Captivate eLearning project. This is useful when you have multiple slide interactions that you want to appear as single slide interactions to your learners. Free Download Members of my YouTube channel can download the completed project.
Tiny App Tuesday #4 - Oracle VM VirtualBox
As an eLearning designer, developer I sometimes need to install software to create software demos, or assessment through software simulation. If you’re like me your main PC or Mac is super important to your business. I’m not crazy about installing software on my computer without really knowing what impact it will have on my other software that is essential to my business.
The solution to this problem is to install virtual machines on your computer. A virtual machine is a software simulation of a computer system. I first got interested in virtual machines when I had a need to install Macromedia Captivate 1.0, which just doesn’t install on a modern OS like Windows 10. I needed to be able to install Captivate 1 on an operating system from the early 2000s. I selected Windows XP as I had on old unused license for XP but there was no way I was going to wipe my hard drive on my 2019 top of line laptop to install Windows XP. It’s very likely it wouldn’t work anyway. VMware is a company that produces software to emulate a full PC but it’s a professional application that requires a paid license to maintain. My needs were minimal so I looked for a more affordable solution.
I found that Oracle produced VirtualBox, an open sourced virtual machine application that anyone can download, install and configure a virtual PC to run any operating system and subsequent software you need. The best part is that other than taking up some space on your computer storage, these virtual machines have no impact on your main computer and you can delete the virtual machines when you are through with them.
Another benefit of VirtualBox is that you can install it not only on a Windows machine, but you can install it on MacOS and Linux to emulate a variety of OS and software that may not normally be available to your computer in its current configuration.
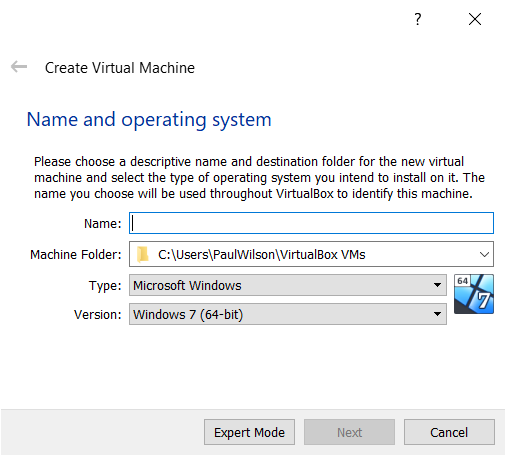
Once you have installed VirtualBox you can merely click on the New icon to begin the process of creating your virtual machine.

The first thing you need to do is give your virtual machine a name and identify what Operating System you intend to install. You can select from Windows, Linux, Solaris, BSD, OS/2, Mac OS X, and possibly others.
You will then need to configure how much of your system RAM you wish to let your virtual machine “borrow.“ The default for a Windows 7 machine is 2GB but you can increase this to what you need. Obviously using all your actual system memory might impact the performance of your machine while running the virtual machine so keep that in mind.
Next, you will select or create a virtual hard disk. VirtualBox will recommend a size based on the operating system but you can increase this if you anticipate more space needed for additional software. For example, a Windows 7 virtual machine recommends a 32GB drive but I usually increase this to 50GB. There are several hard disk file types you can select. I always select the default VDI format which is a VirtualBox Disk Image format but you can select one of the two other formats if you have a need.
If you select the VirtualBox Disk Image you can also select to make the size dynamic. In other words, the virtual drive will grow as it is used. I almost always select Dynamically allocated but if you don’t want the virtual disk to take more than what you previously allocated you can select a fixed size.
Once you’ve selected all the parameters of your virtual machine it’s like having a blank computer with no operating system. You will need to provide an installation disk to virtually place in the virtual machine’s optical drive to install. Scroll down to the Storage section of your new virtual machine and click on the Optical Drive to either choose a disk image or disk file. You can select ISO files like the ones you can download from Microsoft, or other formats such as DMG, CUE, VISO, RAW, and more. For a Windows OS you will likely have an ISO.

While writing this article I downloaded the original file to install Windows 8.1 on my older laptop (just for testing purposes). I then clicked on Start from the VirtualBox Manager interface and within 20 minutes or so, I was able to have a virtual version of Windows 8.1 running on my VirtualBox.

Adobe Captivate Click to Reveal with Audio and Closed Captions
How to create an Adobe Captivate click to reveal that includes audio on each reveal and closed captions.
In this video, I show you how to create an Adobe Captivate click to reveal that includes audio on each reveal and closed captions. Other solutions usually can't include both audio and closed captions and this solution is unique because it doesn't require advanced actions. Free download members of my channel can download this project file as a perk of their membership.
Tiny App Tuesday #3 - PowerToys
A small team over at Microsoft has resurrected the idea of PowerToys for Windows 10. And what’s really good news is that some of these tools are ideal for people in the eLearning development industry.
Do you remember PowerToys from back in the Windows 95 days? Most people who remember it for a functionality called TweakUI where you can customize how Windows 95 looked and functioned. Unfortunately, TweakUI is long gone but a small team over at Microsoft has resurrected the idea of PowerToys for Windows 10. And what’s really good news is that some of these tools are ideal for people in the eLearning development industry.
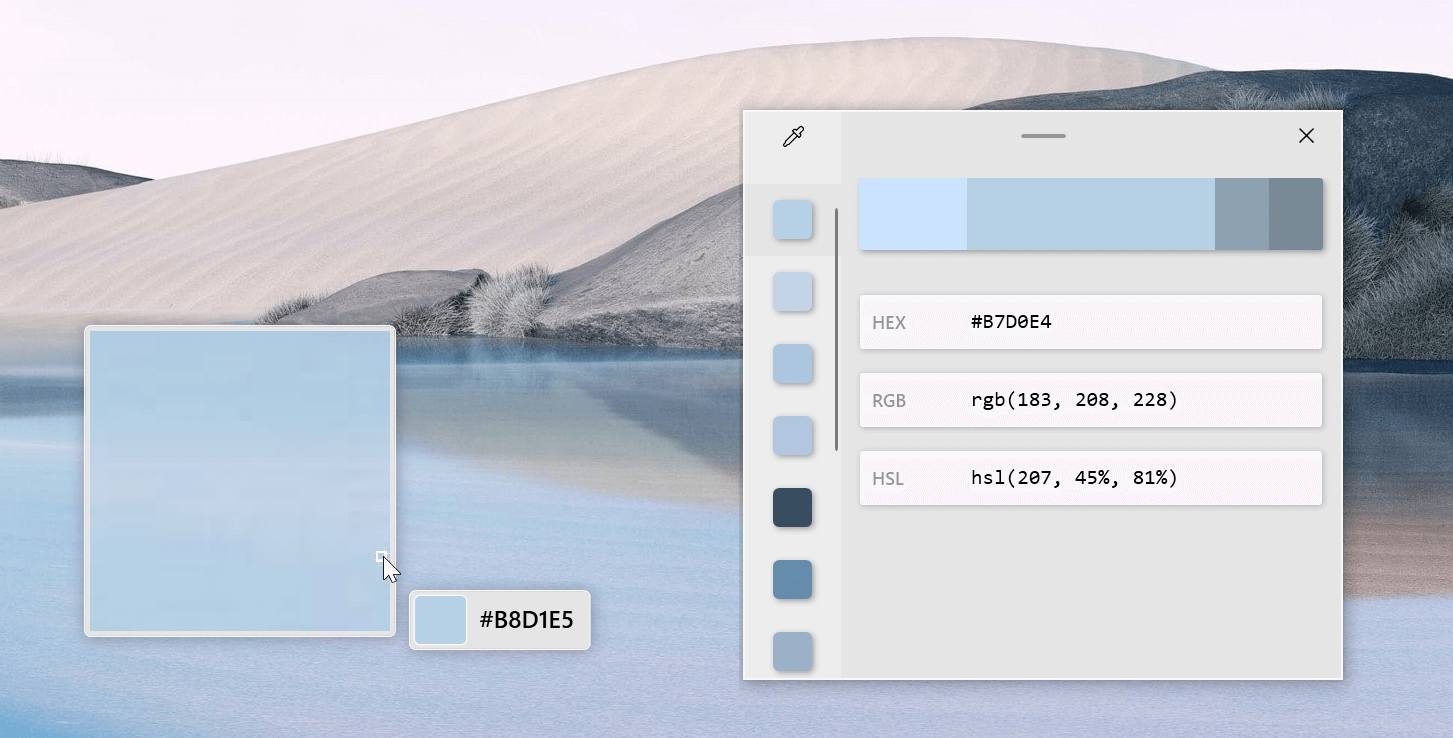
Color Picker
Once installed you can take advantage of the colour picker tool. Using a simple keyboard shortcut you can activate the colour picker which allows you to use your mouse as an eyedropper to select and copy the exact HEX, RGB or HSL colour settings for whatever you click on. This saves me a bunch of steps when I need to capture a colour code from an image.

File Explorer
With Adobe Captivate version 2019 we now have the ability to import SVG images. Unfortunately, Windows doesn’t show you a thumbnail preview of SVG files before you import them. With improvements to File Explorer in PowerToys, you can now have a Preview Pane of SVGs. This is really helpful when you have a folder filled with SVGs and you’re not sure which is the one you are looking for.
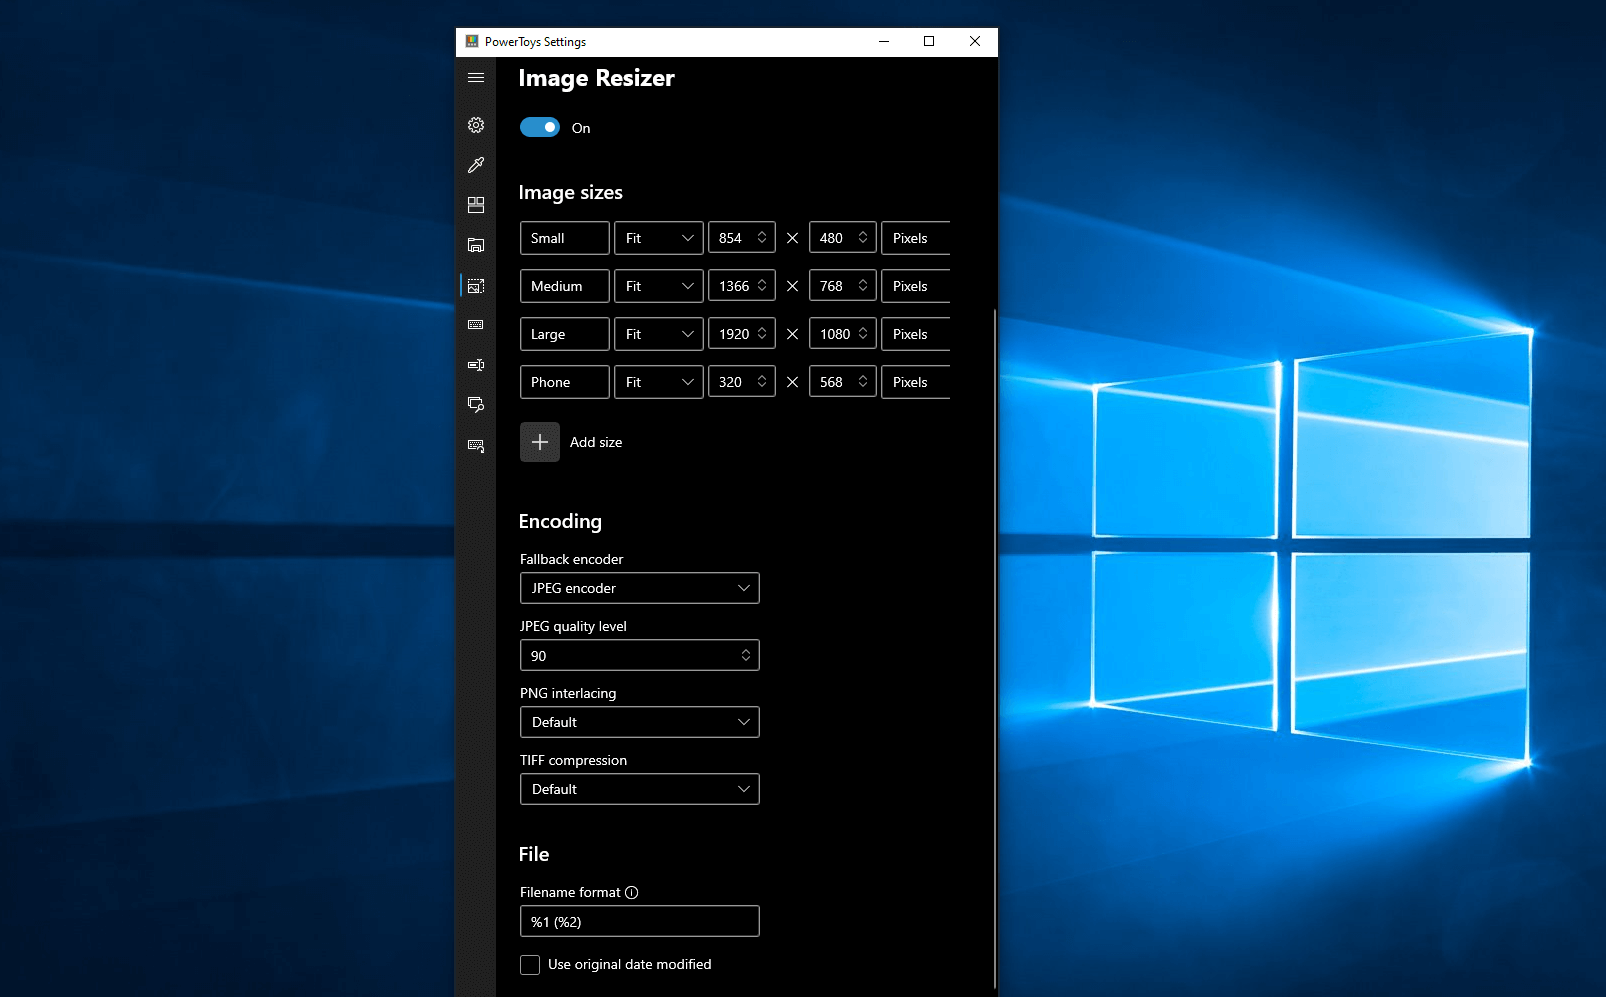
Image Resizer
Probably my favourite feature as an eLearning designer is Image Resizer. If I’m building a course that will contain dozens or even hundreds of images I no longer have to load them up one by one in Photoshop to resize them before importing them into Captivate. Select all the files you wish to resize and right-click on them to select Image Resizer. You can make whatever adjustments you need and make the changes en masse.
Download PowerToys if you would like to add these and other functions to your Windows interface.

Adding Closed Captions to Your Adobe Captivate eLearning
In this video, I show you how you can add closed captions to your adobe captivate elearning.
In this video, I show you how you can add closed captions to your adobe captivate elearning.

Tiny App Tuesday #2 - PureText
In this week’s Tiny App Tuesday, I want to share a tiny free app that I’ve been using for a number of years now. This app is called PureText.
In this week’s Tiny App Tuesday, I want to share a tiny free app that I’ve been using for a number of years now. This app is called PureText. It’s purpose is to streamline the workflow of removing text formatting when you are copying text from a storyboard or presentation file and pasting it into your eLearning authoriing tool. I don’t know about you but I’ve always found that hidden text formating gets copied over and messes with how plain text should look when pasted in Adobe Captivate. PureText can be setup with a unique paste keyboard shortcut so I don’t need to slow down when copying and pasting. I personally use the Windows key + V but you can use anything you wish. PureText is available for free from the authors website but you can also find it in the Windows Store.
https://www.microsoft.com/en-us/p/puretext/9pkjv6319qtl?activetab=pivot:overviewtab
Why Would I Waste My Money on Captivate
Most of the comments on my YouTube videos are encouraging, but someone challenges me every once in a while.
Most of the comments on my YouTube videos are encouraging, but someone challenges me every once in a while.
Here is such a statement from Kim:
“Thanks for the video – however, if Adobe Captivate is such a great teaching tool, why are you using a screen recorder and YouTube to teach it? If all I need is a free screen recorder and YouTube to teach my subject, why would I waste my money on Captivate? Does not make sense. Thanks.”
Here was my answer to Kim:
“That’s a good question, and hopefully, you’ll agree that I have the right answer. Like my favourite handyman Mike uses different tools for different jobs, Adobe Captivate is an excellent tool for many other learning solutions. Adobe Captivate is a perfect tool for creating self-directed learning that you would upload to a learning management system. Adobe Captivate projects with a good LMS allows an organization to track and report on the progress of their learners. My YouTube videos don’t do this at all. Sure Google gives me analytics related to how many people watched my videos and for how long, but I have no idea if anyone is learning anything. Besides, the purpose of my YouTube videos is not necessarily to train my students. I prefer to think of my YouTube videos as advertising for my real business, teaching clients Adobe Captivate. My videos are the free sample to find out if you would like to have me teach you for an hour or more on one or more topics about Captivate.
But like Mike the handyman, I use other tools for other tasks. I record and edit my videos for YouTube using a program called Camtasia (there is a link in the description for this). I used to use Adobe Captivate’s Video Demo feature, which performs a similar function. In this case, Camtasia is a more robust solution. If you asked me to create a software simulation or an interactive video that I could report on the learners’ results, Adobe Captivate and a good quality LMS would be my choice.”

Convert Audio Files for Adobe Captivate Using Software You Already Have
In this video tutorial, I show you how you can convert audio files that have been sent to you for inclusion in your Adobe Captivate eLearning project but are in the wrong file format.
In this video tutorial, I show you how you can convert audio files that have been sent to you for inclusion in your Adobe Captivate eLearning project but are in the wrong file format. The good news is that you already have this software installed on your computer.